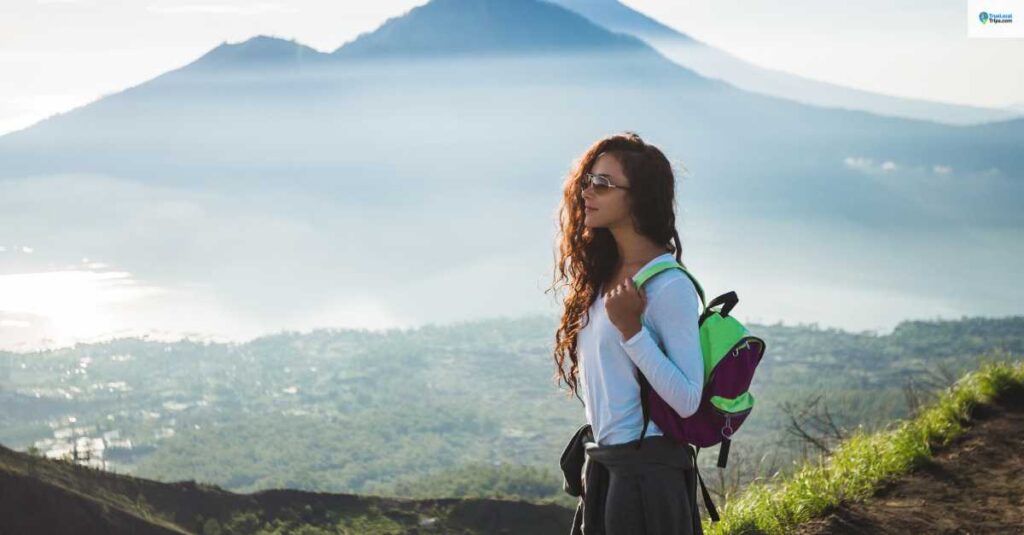
Indonesia isn’t short on Instagram views, but many of the best angles are still quiet if you know where to look. If you love long golden hours, colorful markets, and misty volcano lines, photography travel Indonesia will feel like a dream. From emerald rice terraces to coral-blue bays, the country gives you variety in a single trip and light that’s kind to skin tones and landscapes. Even better, many spots are easy to reach with short flights or simple ferry hops.
What makes photography here special is the mix of texture and story. One morning you can frame a temple gate with soft clouds, and by afternoon you’re shooting fishermen pulling nets at sunset. Locals are warm and open when asked politely, so portrait moments come naturally. Monsoon skies can change fast, which means dramatic clouds and richer color after rain.
This guide focuses on epic but less-crowded places and how to capture them well. You’ll get timing tips for each region, simple gear choices for tropical weather, and quick settings that work right away. We’ll also cover etiquette so your photos respect culture and keep temples and villages calm. By the end, you’ll have a clean shot list, a smart plan for sunrise and blue hour, and confidence to create images that feel fresh, not overdone.
Why Indonesia Is a Dream for Photographers

Indonesia is a playground for photographers. It’s made up of more than 17,000 islands, each with its own colors, cultures, and natural drama. For anyone exploring photography travel Indonesia, it’s a country that delivers variety, authenticity, and the kind of light that seems made for storytelling. Whether you shoot landscapes, portraits, wildlife, or street scenes, Indonesia offers a perfect mix of contrasts — calm one moment, chaos the next — and that’s what makes great photos.
Endless Variety in Every Frame
Few countries in the world offer such diverse backdrops within a single trip. You can capture volcanic peaks glowing at sunrise in Java, turquoise lagoons in Raja Ampat, ancient temples in Yogyakarta, and the soft, green rice terraces of Bali. Head to Sumatra for raw wilderness and orangutans in misty jungles, or to Sumba for open plains and tribal villages that look unchanged for centuries. Every island tells a new story — and every photo feels like a chapter in an adventure book.
Natural Light Made for Photography
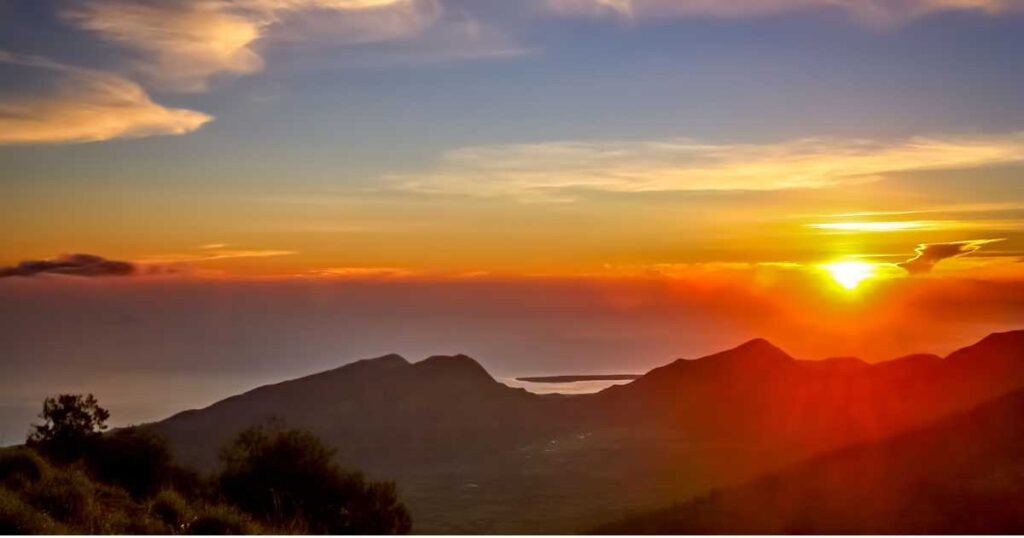
The equatorial light in Indonesia is special. Early mornings bring mist that softens your subjects, while late afternoons give that deep golden warmth photographers crave. In highland regions like Bromo or Toraja, cooler air adds clarity and contrast to your shots. Tropical storms can roll in fast, but when they pass, the skies often burst into color, creating some of the best post-rain sunsets you’ll ever capture.
Rich Culture and Human Connection
Photography here isn’t just about the landscape — it’s about the people. Indonesia’s 700+ ethnic groups each have their own traditions, ceremonies, and everyday beauty. You can photograph temple offerings in Bali, batik makers in Java, or fishermen in Lombok at dawn. The key is respect and interaction: when you take the time to connect, locals often invite you to document their world, and those candid moments are often your best shots.
Affordable and Accessible for Creators
Compared to many photography destinations, Indonesia is budget-friendly. Flights between islands are short and inexpensive, accommodations range from simple guesthouses to stylish eco-lodges, and even professional guides are affordable. You don’t need to spend much to capture world-class images — only curiosity and patience.
In short, Indonesia isn’t just a destination — it’s a living studio. Every frame tells a story, every sunrise feels personal, and every encounter can become the shot you’ll remember for years.
12 Epic Photo Spots in Indonesia for 2025 (Organized by Region)
Indonesia is full of postcard-perfect views, but the real magic happens when you step away from the crowds and find the quiet moments — the soft light, the open spaces, and the locals who live in rhythm with nature. For anyone planning photography travel Indonesia, these twelve locations are the perfect mix of breathtaking scenery and peaceful atmosphere. Each one gives you something unique to capture — from misty volcanoes to crystal-blue waters and golden city lights — without fighting through tourist lines.
Bali – Tegalalang Rice Terraces and Lempuyang Temple
Bali has long been the heart of Indonesian photography, but even here, some places still hold a calm charm. The Tegalalang Rice Terraces in Ubud are iconic for their layers of green that seem to flow like water under the morning sun. Arrive just after sunrise, when the light hits the terraces from the side, giving texture to every curve of the fields. Early mornings also mean fewer people and more natural tones in your shots. Bring a drone if possible — aerial photos here show the elegant lines of the terraces better than any ground shot.
Not far away lies Lempuyang Temple, often called the “Gate of Heaven.” The temple’s split gate perfectly frames Mount Agung in the background. To avoid the famous photo queue, visit at dawn or late afternoon on a weekday. On clear days, you can catch the mountain glowing orange as the sun sets behind it. Keep your frame balanced between the gate and the peak, and remember that locals appreciate modest clothing and calm behavior at this sacred site.
Java – Mount Bromo and Borobudur Temple
Java offers some of the most dramatic landscapes in Southeast Asia. Mount Bromo, an active volcano in East Java, is a favorite for sunrise photography. From the Penanjakan viewpoint, you can capture the volcano’s smoke rising over a sea of mist, with Mount Semeru puffing in the distance. The best time to shoot is from 4:30 to 6:00 a.m., when the light hits the caldera and the contrast between shadow and golden peaks is strongest. Use a telephoto lens for close-ups of the smoking crater and a wide lens for panoramic views of the entire Tengger massif.
In Central Java, Borobudur Temple offers another iconic image — especially at sunrise when the mist wraps around its ancient stupas. Arrive by 4:30 a.m. and climb to the upper terrace to photograph the sun breaking through the haze. The temple’s symmetry and repetitive patterns make for perfect leading lines. Local guides can share quiet angles away from the crowds, where monks and pilgrims walk through soft beams of light — ideal for spiritual, documentary-style photos.
Sumatra – Lake Toba Cliffs and Villages
Sumatra’s landscapes are vast and wild, but Lake Toba is where the island’s beauty feels both grand and peaceful. This volcanic lake is one of the largest in the world, and its steep cliffs and calm blue water create powerful compositions for photographers. From the hills of Tele or Bukit Holbung, you can capture sweeping panoramas with warm evening light reflecting on the lake. For more intimate shots, visit Batak villages around Samosir Island. The traditional rooflines, colorful textiles, and smiling locals offer beautiful portrait opportunities. Mornings are best for still water reflections, while evenings are perfect for long-exposure shots with soft orange skies.
Flores – Padar Island Overlook
If there’s one place that defines adventure photography in Indonesia, it’s Padar Island in Flores. The island’s viewpoint offers a 360-degree panorama of three curved bays with beaches of different colors — white, pink, and black. To get the perfect shot, hike up 20–30 minutes before sunrise with a tripod and wide lens. The climb is steep but short, and the light just before dawn paints the bays in pastel tones that disappear quickly after sunrise. In the evening, golden light hits the western cliffs, creating warm hues that look stunning even on a simple phone camera. Bring neutral density filters if you want to capture smooth clouds and gentle waves.
Raja Ampat – Piaynemo Viewpoint
Raja Ampat in West Papua is a dream for seascape photographers. The Piaynemo viewpoint gives you a view of limestone karsts surrounded by turquoise water so clear that you can see coral shapes from above. It’s one of the most photogenic scenes in all of Indonesia. To reach it, you’ll take a short climb up wooden steps to the platform. Visit early morning or late afternoon to avoid harsh light, and use a polarizing filter to deepen the color of the water. Drones are allowed in some areas but check local regulations first — this region is part of a protected marine park. The light here changes quickly, so plan to shoot multiple exposures for HDR editing later.
Sulawesi – Tana Toraja Traditional Houses
In the highlands of South Sulawesi, Tana Toraja is famous for its pointed-roof houses called Tongkonan and for its intricate funeral traditions. Photographing here feels like stepping into another time. The best shots come from early morning when mist rises between the wooden houses, giving your photos a soft, mystical feel. Locals are friendly but value respect — always ask before photographing ceremonies. Wide-angle lenses capture the dramatic shapes of the roofs, while close-up shots reveal the hand-carved details and buffalo horns lining the facades. Cultural portraits here are rich in color and emotion.
Lombok – Selong Belanak Beach
Selong Belanak Beach in Lombok is perfect for minimalist landscape shots. The wide, crescent-shaped bay has fine white sand and calm waves that reflect the sky like a mirror during low tide. The surrounding green hills provide an ideal natural frame for your photos. Sunrise and sunset both work here, but morning light gives a cleaner, softer tone, especially when local fishermen pull their boats ashore. Bring a tripod for silky-water long exposures and a polarizing filter to remove glare from wet sand. The area remains peaceful compared to Bali, so you can capture wide, uncluttered scenes.
Yogyakarta – Malioboro Street Portraits
Yogyakarta is the heart of Java’s art scene and a paradise for street photographers. Malioboro Street is always alive with movement: street vendors, rickshaw drivers, musicians, and local students create endless stories to frame. The best time to shoot is late afternoon to early evening when the city lights mix with natural light for a warm, cinematic effect. A 35mm or 50mm lens lets you stay close without intruding. Try capturing details — a hand serving coffee, a smile under neon signs, or the reflection of batik shops in glass windows. Respect personal space, and if someone notices your camera, smile and show appreciation.
Belitung – Granite Rock Coast
Belitung Island, off the coast of Sumatra, is one of Indonesia’s underrated gems for seascape photography. Its coastline is dotted with giant granite boulders rising from clear blue water, especially around Tanjung Tinggi Beach. Early morning is best for soft golden tones, but midday light also works for underwater clarity if you plan drone shots or split-water images. You can wade between rocks and capture their reflections on calm days. The simplicity of Belitung’s beaches allows you to focus on shape, texture, and pattern — a playground for creative compositions.
Banyuwangi – Ijen Blue Fire
In East Java, Kawah Ijen offers one of the world’s rarest photo opportunities — the electric-blue flames of burning sulfur that appear before sunrise. To capture them, start hiking around 1 a.m. with a headlamp and proper gas mask. Use a tripod and long exposure to make the flames glow without losing detail in the dark. After sunrise, stay for the daylight shots of the turquoise crater lake surrounded by cliffs and miners carrying sulfur baskets — an image that tells both beauty and hardship.
Komodo Island – Wild Landscapes and Pink Beach
Komodo Island is more than just home to its famous dragons. It’s a wild, rugged landscape that feels like a prehistoric world. The dry hills turn golden in the afternoon sun, contrasting with deep blue waters below. Hike to the top of Padar’s smaller sibling hills for wide, layered compositions. Nearby Pink Beach is perfect for drone photography — the coral-tinted sand creates a surreal color gradient where land meets sea. Shoot in early morning light to capture the pink hue most vividly.
Jakarta – Old Kota District Architecture
Even Indonesia’s capital has charm for photographers who look deeper. The Old Kota District in Jakarta is filled with colonial-era buildings, narrow alleys, and faded pastel colors that create a cinematic atmosphere. Try visiting early in the morning before the heat and traffic begin. Play with symmetry and depth using archways, doorways, and bicycle shadows as leading lines. Local street vendors and artists often become spontaneous portrait subjects if you ask politely. It’s an ideal place to end your trip, capturing how history and modern life blend in one frame.
Together, these twelve photo spots represent Indonesia’s full spectrum — from sea to summit, from sacred sites to street life. They’re not just beautiful scenes, but living stories waiting to be framed through your lens.
Best Times and Lighting Tips for Photography Travel in Indonesia
When it comes to photography travel Indonesia, timing and light make all the difference. The same landscape can look completely different depending on the hour, the season, or even the weather that day. Understanding Indonesia’s tropical rhythm helps photographers plan smarter, shoot better, and make every moment count. From the bright skies of Bali to the misty hills of Java, here’s how to find the perfect light across the islands.
Understanding Indonesia’s Tropical Light
Indonesia lies along the equator, meaning daylight hours are almost equal year-round — roughly from 6 a.m. to 6 p.m. However, the sun’s intensity can be strong, especially between 10 a.m. and 3 p.m. During this time, harsh shadows can make your photos appear flat or overexposed. The best hours for soft, balanced light are the golden hour (one hour after sunrise and before sunset) and the blue hour (just before sunrise and after sunset). These moments give a natural glow that enhances colors, textures, and skin tones.
Tropical weather also adds variety. After short bursts of rain, the air becomes clearer, colors richer, and skies more dramatic — perfect for landscapes. Clouds often form in the afternoons, creating diffused light that’s ideal for portraits and street photography.
Golden Hour and Blue Hour Timing by Region
To make it easier to plan your shots, here’s a quick guide to the best shooting hours across popular destinations.
| Region | Golden Hour (AM) | Golden Hour (PM) | Blue Hour (Pre-Dawn) | Blue Hour (Dusk) | Best Season |
|---|---|---|---|---|---|
| Bali | 6:00 – 7:00 a.m. | 5:30 – 6:30 p.m. | 5:15 – 5:45 a.m. | 6:30 – 7:00 p.m. | April – October |
| Java (Bromo/Yogya) | 5:30 – 6:30 a.m. | 5:15 – 6:15 p.m. | 4:45 – 5:15 a.m. | 6:15 – 6:45 p.m. | May – September |
| Sumatra | 6:15 – 7:15 a.m. | 5:45 – 6:45 p.m. | 5:30 – 6:00 a.m. | 6:30 – 7:00 p.m. | June – September |
| Flores/Komodo | 5:45 – 6:45 a.m. | 5:15 – 6:15 p.m. | 5:00 – 5:30 a.m. | 6:15 – 6:45 p.m. | April – November |
| Raja Ampat | 5:30 – 6:30 a.m. | 5:15 – 6:15 p.m. | 4:45 – 5:15 a.m. | 6:15 – 6:45 p.m. | October – April |
| Sulawesi | 5:45 – 6:45 a.m. | 5:30 – 6:30 p.m. | 5:00 – 5:30 a.m. | 6:30 – 7:00 p.m. | May – October |
| Lombok | 5:45 – 6:45 a.m. | 5:30 – 6:30 p.m. | 5:00 – 5:30 a.m. | 6:30 – 7:00 p.m. | April – October |
Tips for Capturing the Best Light
1. Plan Around Sunrise and Sunset
Indonesia’s landscapes come alive at the edges of the day. At sunrise, mist softens the mountains and rice terraces, giving a cinematic tone to your photos. At sunset, beaches, temples, and volcano silhouettes glow in rich golden-orange tones. Use weather apps like Windy or PhotoPills to track sun position and cloud cover.
2. Use Clouds to Your Advantage
Cloudy skies might seem dull, but they create diffused light that’s perfect for portraits or temple shots where harsh sunlight can ruin the atmosphere. The soft shadows bring out colors in stone, wood, and skin. Try shooting during late afternoons after light rain — that’s when reflections and textures look their best.
3. Embrace the Rainy Season for Drama
Indonesia’s wet season (roughly November to March) might scare off tourists, but photographers can find magic in it. The rain makes landscapes lush, skies vibrant, and waterfalls powerful. Bring a rain cover for your camera and microfiber cloths for quick lens cleaning. Stormy clouds also make fantastic time-lapse subjects.
4. Balance Sunlight with Shadows
In the tropics, direct sunlight can be strong, but shadows tell their own story. In markets, alleyways, or under temples, look for pockets of soft, filtered light. This contrast adds emotion and depth to your photography.
5. Watch the Moon and Tides
If you’re shooting beaches in Bali, Lombok, or Belitung, check tide charts. Low tides reveal mirror-like sand reflections at sunset, while full moons create bright nightscapes perfect for long exposures.
Bonus Tip for Drone Photographers
If you’re flying a drone, avoid mid-day when the sun sits high — it flattens your perspective. Early morning or late afternoon flights add depth through shadows and color gradients, especially over rice terraces, coral bays, and cliffs. Always follow drone rules set by the Indonesian Directorate General of Civil Aviation, which require registration for drones above 250 grams.
Mastering light is what transforms travel photos into art. With a bit of planning, Indonesia rewards every patient photographer with natural color, living texture, and atmosphere you can almost feel through the frame.
Essential Gear and Camera Settings for Tropical Photography in Indonesia
Tropical conditions are beautiful but demanding. Heat, humidity, salt spray, sudden rain, and strong sun can challenge your camera. With a simple, smart kit and a few go-to settings, you’ll be ready for anything photography travel Indonesia throws at you.
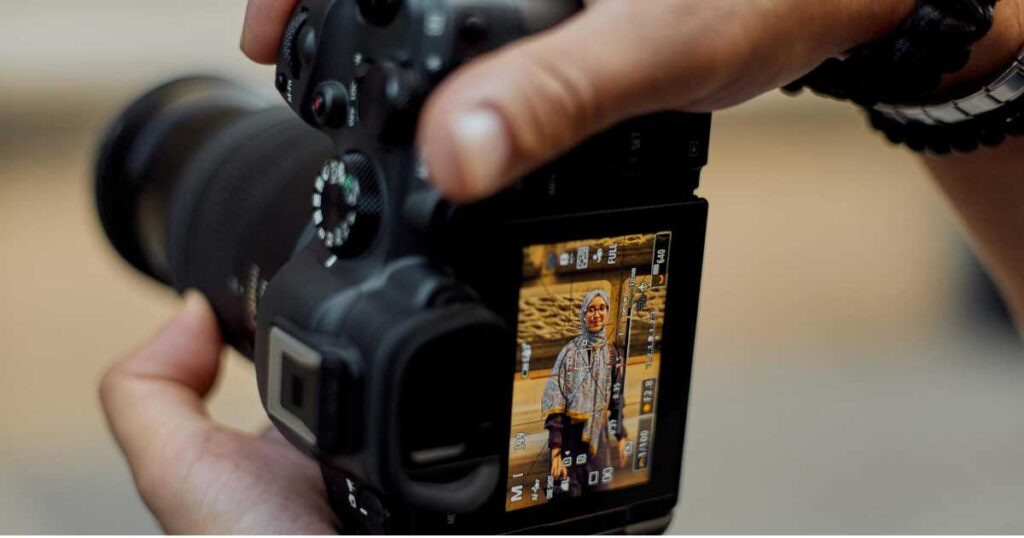
Core Camera Kit that Works Everywhere
Carry one main body and one small backup if you can. A weather-sealed mirrorless or DSLR is ideal, but a modern phone plus a compact camera can still deliver great results. Pack three lenses to cover almost all scenes:
- Wide zoom (16–35mm full-frame or 10–20mm APS-C) for landscapes, temples, and interiors
- Standard zoom (24–70mm or 18–55mm) for everyday scenes and portraits
- Telephoto (70–200mm or 55–210mm) for wildlife, distant peaks, and tight compositions at sunrise
If you prefer primes, a light trio works well: 20mm or 24mm for scenery, 35mm for street, 85mm for portraits.
Must-Have Accessories for the Tropics
Circular polarizer to cut glare on water and wet leaves and deepen skies
3- or 6-stop ND filter for silky water and motion blur in clouds
Light travel tripod (carbon or compact aluminum) with a simple ball head
Rain cover or dry bags plus a handful of silica gel packs for humidity control
Microfiber cloths and a rocket blower for salt spray and dust
Extra batteries and a small 20,000 mAh power bank; heat drains batteries fast
Dual SD cards or one high-endurance card set to back up to the second slot if available
Quick Protection Routine in Humidity and Rain
Keep gear in a dry bag when moving. Let the camera warm up before shooting from AC rooms to avoid condensation. Rotate silica gel packs nightly. After beach shoots, wipe the body and lens with a damp cloth, then dry. Never change lenses in sea spray or fine ash near volcanoes.
Baseline Camera Settings that Just Work
Use Aperture Priority for speed with exposure compensation on your thumb.
Landscapes at sunrise or sunset: f/8–f/11, ISO 100–400, set exposure comp to −0.3 to hold sky color.
Hand-held street and portraits: f/2–f/4, ISO Auto capped at 3200, minimum shutter 1/250 s.
Waterfalls and waves with motion blur: ND filter on, 0.5–1 s for soft flow, 2–4 s for silky water; use tripod, ISO 100, f/8.
Blue hour city or temple scenes: tripod, ISO 100–400, f/8, 2–10 s; enable 2-sec timer to avoid shake.
Backlit rice terraces or beaches: spot meter for highlights, add +0.3 to +0.7 if subjects go too dark, or shoot a 3-frame bracket for an easy HDR blend later.
Fast Focus and Sharpness Tips
Use single-point AF for landscapes and place the point one-third into the scene to maximize depth.
Switch to continuous AF with face/eye detect for people in markets or ceremonies.
For distant layers like Bromo ridges, use manual focus with focus peaking at 10x magnification.
Enable lens IS or body IBIS; turn it off only on a tripod for multi-second exposures.
Color and File Format for Tropical Light
Shoot RAW for maximum recovery in highlights after bright midday moments.
Set white balance to Daylight for sunrise and sunset to keep warm tones.
Use Cloudy WB in rain or shade to avoid cold, gray color.
If shooting JPEG, pick a neutral profile and add contrast later; tropical scenes can clip fast.
Drone Essentials for Island Landscapes
Carry one spare battery and ND16 filter for smooth video at 1/50–1/60 shutter.
Fly at golden hour for depth and soft shadows; avoid midday glare.
Calibrate compass away from cars and concrete. Land if wind warnings appear.
Always follow local rules, keep distance from people, temples, and wildlife, and check park restrictions.
Phone Photography that Looks Pro
Lock exposure and focus by long-pressing your subject, then slide exposure down slightly to protect highlights.
Use the ultra-wide lens for rice terraces and karst bays; step closer instead of pinching to zoom.
For night markets, use burst mode and pick the sharpest frame, or brace against a wall for stability.
Carry a clip-on circular polarizer sized for your phone case to cut glare on water.
Storage, Backup, and Power on the Road
Follow 3-2-1 backup: keep photos on two SD cards in camera when possible, copy daily to a small SSD, and once a week mirror that SSD to cloud when you have fast Wi-Fi.
Name folders by date and location, for example 2025-06-12_Bali_Tegalalang.
Charge everything every night; use a small travel power strip so one outlet handles all chargers.
Quick Troubleshooting in the Field
Haze over volcanoes: add a polarizer, stop down to f/8, and increase micro-contrast later.
Harsh sun on faces: move subjects into open shade or backlight them and expose for skin, then lift shadows in post.
Salt spray on lens: do not wipe dry; first fog the glass lightly with breath, then clean with microfiber.
Unwanted crowd movement: use 1/4–1/2 s with ND and tripod to blur people while keeping architecture crisp.
With a compact kit, a few filters, and these repeatable settings, you’ll be ready to capture Indonesia in any light, from misty dawn at Borobudur to neon dusk on Malioboro Street. Good gear helps, but planning and patience are what turn good frames into great ones.
Respectful Photography Etiquette in Temples, Villages, and Nature
Good photography is not just about light and timing — it’s about respect. When exploring photography travel Indonesia, understanding local customs and showing kindness are as important as getting the perfect shot. Indonesians are warm, patient, and generous, but culture here values humility. A respectful approach opens doors, wins smiles, and earns you better, more meaningful photos than rushing in with your camera.
Respecting Sacred Sites and Temples
Temples in Indonesia, especially in Bali and Java, are living places of worship, not tourist attractions. Always dress modestly — wear a sarong and sash if you have them, or rent one at the entrance. Before shooting, observe quietly and look for signs that say “no photography.” Some temples, like Besakih or Uluwatu, restrict flash or drones near ceremonies. Never step onto altars, cross offerings on the ground, or pose between priests and worshippers. If locals are praying, lower your camera and wait; respectful patience earns trust and access later.
When photographing ceremonies or dances, avoid standing in front of locals or blocking their view. Keep your camera quiet or use silent shutter mode. Ask temple staff or guides for permission if you want to photograph details like holy water rituals or blessings — they often appreciate your courtesy and will help you find good angles that don’t intrude.
Cultural Etiquette in Villages and Markets
Indonesia’s villages are some of the most photogenic places in the world — smiling children, handmade crafts, farmers in rice fields — but they are also homes. Before taking portraits, always ask for permission with a friendly gesture or a simple phrase like “Boleh foto?” (May I take your photo?). A warm smile goes a long way. If someone refuses, thank them and move on. For portraits, show the image afterward; people enjoy seeing themselves and it often turns into laughter or conversation.
Avoid handing out money for photos, as it can create dependence in small communities. Instead, buy something from a local shop or food stall, or share prints if you plan to return. In smaller islands like Flores or Sumba, photography is welcomed when it’s mutual — people are curious about you too. Engage, learn a few local words, and you’ll capture expressions that feel honest rather than staged.
Being Ethical with Wildlife and Nature
Indonesia’s biodiversity is world-famous, but it’s also fragile. Always keep your distance from animals, especially in protected areas like Komodo National Park, Raja Ampat, and Tanjung Puting. Never feed wildlife or use flash — it can stress animals or alter their behavior. For underwater shots, practice good buoyancy so you don’t damage coral, and avoid touching marine life even if guides say it’s fine.
If you’re photographing fishermen, farmers, or workers, do so with sensitivity. They’re proud of their work, but avoid framing them as “exotic subjects.” Tell their story through context and dignity. Highlight the environment, not just faces. Responsible photography should never exploit or misrepresent the people or places you capture.
Drone Etiquette and Legal Boundaries
Drone shots are stunning, but they come with responsibility. Always check local rules — many temples, villages, and national parks prohibit drone use. Stay at least 50 meters from people and animals, and never fly over religious ceremonies or private property. Some areas, especially near airports or government buildings, are restricted by law. Fly early in the morning to minimize disturbance and respect quiet hours in villages.
Environmental Care During Shoots
Leave every location as you found it — or better. Carry reusable water bottles, take your trash, and avoid trampling plants for a “better angle.” Stick to marked paths in rice terraces and national parks to protect the land farmers and rangers care for. A single careless footprint can damage crops or coral that took years to grow.
When in Doubt, Choose Respect Over the Shot
If you ever feel unsure, ask or wait. A photo can be retaken — respect cannot. Indonesians appreciate visitors who care about their culture and land. Your kindness will often be rewarded with genuine smiles, access to private ceremonies, and invitations into homes that lead to some of your most authentic, unforgettable images.
By traveling gently and photographing with empathy, you become part of the story instead of just an observer. Your lens will reflect not only Indonesia’s beauty but also the heart of its people.
Editing and Storage Tips While Traveling in Indonesia
Editing and storage may not sound exciting, but they are what keep your photography travel Indonesia experience smooth, safe, and stress-free. When you’re moving between islands, Wi-Fi might be slow and humidity can damage equipment fast. Smart organization, gentle edits, and regular backups make sure your best photos survive the trip and look professional when you get home.
Keeping Your Files Safe on the Go
Back up your photos daily. Use a simple rule called 3-2-1: keep three copies of your images, on two different devices, with one stored elsewhere. That could mean saving to your camera’s second memory card, copying everything to a portable SSD each night, and uploading selected favorites to cloud storage when you have Wi-Fi.
Carry your SSD and SD cards in separate bags, so you never lose everything at once. Label cards clearly by date and destination, for example: 2025-05-14_RajaAmpat. When flying between islands, keep memory cards in your carry-on, not checked luggage, to avoid extreme temperature changes.
Fast Editing Tools That Work Offline
Most photographers traveling across Indonesia rely on lightweight editing setups that work even without the internet. Apps like Lightroom Mobile, Snapseed, or VSCO are perfect for quick color corrections, straightening horizons, or fixing exposure. For laptops, Adobe Lightroom Classic or Capture One Express give full control over RAW files and let you sync presets across devices when you’re online again.
Create a few ready-made presets for tropical tones — for example, one for golden hour warmth, one for cool blue beach shots, and one for rainy diffused light. This helps you keep a consistent look across your portfolio even when shooting in different islands and conditions.
Editing Style for Indonesia’s Colors
Tropical light brings bold color, but it’s easy to overdo it. Keep saturation natural — Indonesia’s greens and blues are vivid enough. Instead of heavy filters, focus on balancing highlights and shadows. Reduce highlights slightly to keep cloud detail, and lift shadows gently to show faces under hats or temple roofs. Add a little clarity or texture to enhance volcanic detail or rock patterns, but avoid over-sharpening portraits.
Warm up sunrise and sunset images slightly (around +400 to +600 Kelvin in white balance), but keep midday tones neutral to maintain realism. If you photograph markets or ceremonies, adjust white balance manually — mixed light from candles, neon, and daylight can create unwanted color casts.
Organizing Your Catalog Efficiently
Create folders for each island or region, like Bali, Java, Flores, and Sumatra, and within them, sort photos by day or activity. Use keywords such as “temple,” “drone,” “portrait,” or “market” so you can find images easily later. Good organization means less time searching and more time shooting.
Once you’ve edited your top selects, flag or rate them so you can export only the best for posting. Export JPEGs in high quality (around 85%) and resize to 2048px wide for web uploads — this keeps file size light but sharp for online sharing. Always keep your RAW files intact for future re-edits.
Managing Power and Connectivity
Many remote islands in Indonesia experience power cuts or limited charging outlets. Pack a multi-plug extension and charge everything at night. Keep a small power bank handy for phones or portable drives. If you’re editing on a laptop, disable background syncing to save battery.
Wi-Fi speed varies — it’s decent in Bali and Java, but slow in Flores, Raja Ampat, or Sumba. Use cloud uploads only for essential shots. Otherwise, rely on physical backups until you reach a city with stable internet.
Sharing Photos Responsibly
When you post online, tag locations respectfully. Avoid revealing exact GPS coordinates of fragile sites like hidden beaches or small coral islands — overexposure can lead to crowding or environmental damage. Instead, share general areas (like “East Bali” or “West Flores”). Always credit locals or guides who helped you find the spot.
If you photograph people, especially in villages or ceremonies, ask before posting their portraits. Showing respect online keeps the connection positive and honors the trust they gave you.
Final Tip: Edit with Emotion, Not Just Precision
Technical perfection is great, but what makes Indonesia unforgettable is emotion — the mist after rain, the laughter in markets, the calm at sunrise. When you edit, let your photos feel human. Keep small imperfections if they tell the story honestly. A slightly tilted horizon or a bit of motion blur in a dancer’s skirt might express the energy better than a flawless shot.
Editing and organization might happen behind the scenes, but they are what protect your creative journey. With care, you’ll return home not just with thousands of images, but with a collection that captures the real heart of Indonesia — vibrant, raw, and beautifully alive.
Also Read: Island Hopping Indonesia: Routes, Stays & Travel Tips
FAQs — Photography Travel Indonesia
1. What is the best time of year for photography travel in Indonesia?
The dry season from April to October is ideal for photography travel Indonesia. Skies are clear, lighting is predictable, and landscapes are vibrant. The wet season (November to March) also offers unique opportunities — dramatic clouds, reflections, and fewer crowds — perfect for moody, cinematic shots if you don’t mind quick rain showers.
2. Do I need a special permit to use a drone in Indonesia?
Yes, drone use is regulated. You must register your drone if it weighs over 250 grams and always follow local rules. Avoid flying near temples, military areas, airports, and wildlife zones like Komodo National Park. Some regions, such as Bali or Raja Ampat, require additional local permits, which your guide can help arrange.
3. Are tripods allowed in temples or public spaces?
Tripods are generally allowed in open spaces, but some temples and museums restrict them for safety reasons. Always ask guards or caretakers first. In crowded places like Borobudur or Uluwatu, handheld shots or small tabletop tripods are safer and quicker to set up.
4. Is it safe to carry camera gear around Indonesia?
Yes, Indonesia is generally safe, especially in tourist areas. Use a discreet camera bag, avoid flashing expensive gear in busy streets, and keep backups on a separate memory card or drive. In smaller villages, locals are often curious rather than threatening — a friendly chat before shooting makes all the difference.
5. Can I hire local photography guides?
Absolutely. Many destinations have local guides who know the best angles, lighting times, and hidden spots. Hiring them not only helps your photos but also supports local livelihoods. They can also act as translators and help you connect respectfully with communities.
6. How do I protect my camera in tropical humidity?
Use silica gel packs in your bag, keep gear in airtight cases at night, and let your camera adjust slowly when moving from air-conditioned rooms to warm outdoors. Wipe lenses with a clean microfiber cloth after beach or waterfall shoots.
7. Are portraits of locals acceptable in Indonesia?
Yes, but always ask permission first. A simple smile or phrase like “Boleh foto?” (May I take your photo?) is polite and appreciated. Many locals enjoy seeing their photos afterward. Avoid taking pictures of children without a parent’s approval and be sensitive around religious events.
8. What camera settings work best for Indonesia’s tropical light?
For daytime scenes, use ISO 100–400, f/8–f/11, and slightly underexpose (−0.3 to −0.7) to protect highlights. During sunrise or sunset, widen the aperture to f/4–f/5.6 and slow your shutter for glowing tones. Always shoot in RAW for flexible editing in post.
9. How do I share my photos responsibly online?
Tag only general locations, avoid pinpointing fragile or sacred sites, and always credit people, guides, or organizations who helped you. Responsible sharing helps prevent over-tourism and keeps destinations sustainable.
10. What makes Indonesia special for photographers?
Indonesia blends culture, color, and contrast like nowhere else. From volcanoes to coral reefs, ancient temples to lively streets, every island tells a different story. For photographers, it’s a living canvas — raw, unpredictable, and endlessly inspiring.
Conclusion — Capturing the Soul of Indonesia Through Photography
Photography is more than just taking pictures; it’s about connection, patience, and seeing life through a different lens. In photography travel Indonesia, every island, every face, and every sunrise offers something deeper than a postcard view — it offers a story. When you travel with awareness, your camera becomes not just a tool but a bridge between cultures, moments, and memories.
From the misty temples of Java to the coral reefs of Raja Ampat, Indonesia gives you light, color, and emotion in perfect balance. The beauty isn’t just in what you see, but in how you experience it — waiting quietly for sunrise over Bromo, sharing laughter with villagers in Sumba, or watching a fisherman cast his net as the sky glows pink. These are the moments that define authentic travel photography — real, fleeting, and human.
As you explore, remember the key to great photography here is respect. Respect the land, the culture, and the people who welcome you. Ask before you shoot, tread gently in sacred spaces, and always give back through your presence and kindness. The more respectfully you move through Indonesia, the more it reveals its soul — and that’s the kind of image no filter can fake.
Indonesia will challenge and reward you at the same time. It’s a place where storms pass quickly, light changes fast, and every photo feels alive. Travel slow, observe, and let your camera tell the story of your journey. When you return home, your pictures won’t just be beautiful — they’ll be meaningful reminders of a country that taught you to see differently.